The Nexus 5 has enjoyed strong reviews and a good early adoption rate so far. However, some users want to use their Nexus 5 for more than just basic Android applications.
The best way to take full advantage of the power of the Nexus 5 is to root it. Rooting the Nexus 5 is surprisingly easy. Today, we’re going to show you how to root your Nexus 5 with just a few simple and easy steps.
Note: This rooting process has been shown to work on the Nexus 5 running Android 4.4 KitKat. One Click Root takes no responsibility for any damage done to your device during the manual rooting process. If that’s okay with you, then please proceed.
Step by step guide
What you need:
-Google Nexus 5 with Android 4.4 KitKat installed
-Flashboot drivers, found here:
http://forum.xda-developers.com/showthread.php?t=2507211
-ChainFire AutoRoot for Nexus 5:
http://autoroot.chainfire.eu/
Like many rooting processes, the Nexus 5 root uses ChainFire. ChainFire has been downloaded over 17.5 million times and is an effective rooting method for many devices – especially those not currently supported by One Click Root.
Step 1)
Download CF AutoRoot to your computer and extract the contents of the .zip to your desktop
Step 2)
Turn off your Nexus 5 and reboot into developers’ mode by pressing and holding the volume buttons and power button at the same time
Step 3)
Connect your Nexus 5 to your PC via USB cord
Step 4) Run
root-Windows.bat on your PC
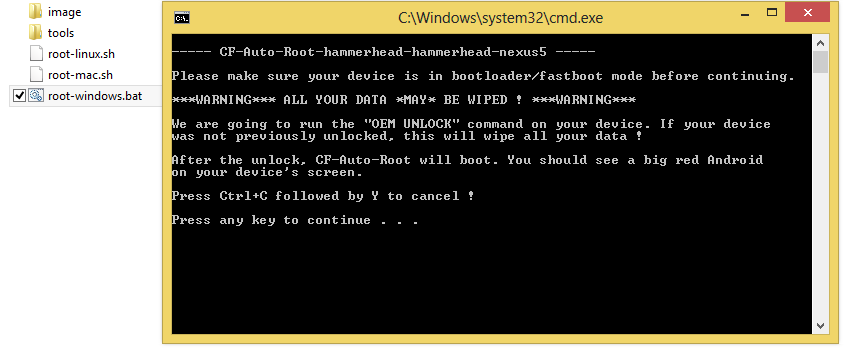
Step 5) Follow the
on-screen instructions and follow along on both your PC and your Nexus 5
Step 6) Wait for your Nexus 5 to reboot and
then install SuperSU from the Google Play Store just like you would install any normal app(sometimes it will install itself automatically after running CF AutoRoot
That’s it! This will install a stock rooted version of Android 4.4 KitKat on your device. After this, you can install custom ROMs and root-only apps while also
enjoying all of the other advantages of a rooted device.
For more information about the CF root for the Nexus 5,
click here to visit the XDA Developers Forum.